
Common induction cooking issues range alot. From the cooktop not turning on, to pan detection failures, mysterious error codes, and strange buzzing noises. The good news? Most induction cooktop problems have straightforward fixes. You can handle them at home, without calling a repair technician. I’ll walk you through every major issue, what causes it, and exactly how to fix it.
Key Takeaways
- Most induction cooktop issues come from power supply, cookware incompatibility, or minor user errors.
- A simple reset (power off for 60 seconds) fixes many problems instantly.
- Magnetic, flat-bottom cookware is essential for proper heating and pan detection.
- Error codes help diagnose issues quickly, some need only cooling or resetting.
- Strange noises are usually normal and caused by cookware vibration or cooling fans.
- Regular cleaning and proper ventilation prevent overheating and control issues.
- Persistent faults or electrical problems may need professional repair.
What Is Causing Induction Cooktop Problems in the First Place?
How Induction Cooking Actually Works
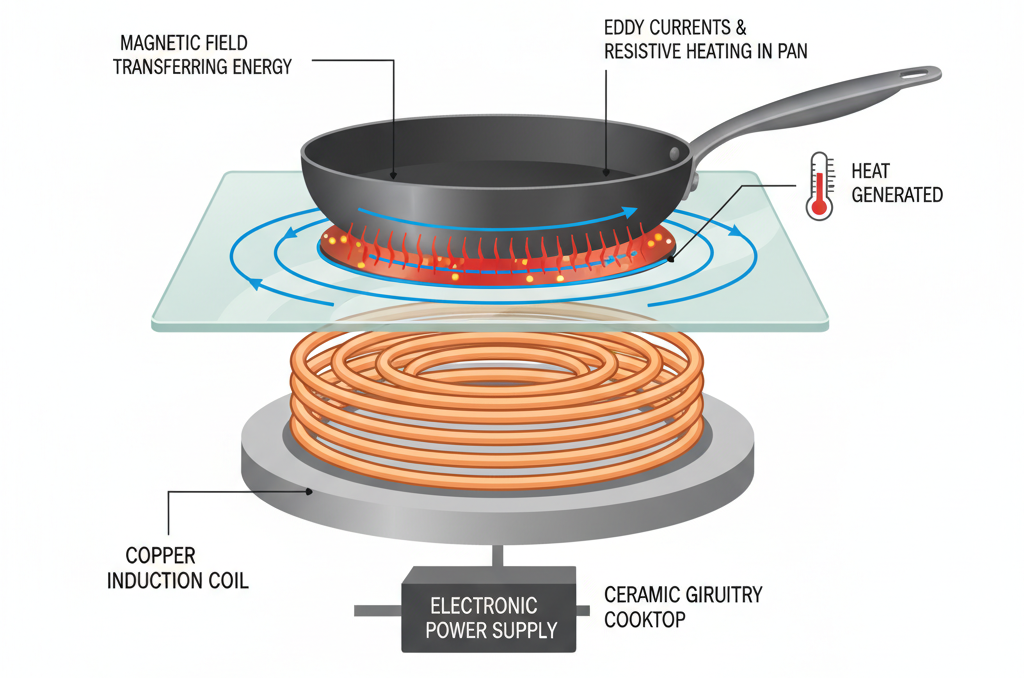
Induction cooking uses electromagnetic energy to heat your cookware rather than heating a burner or surface element first. Underneath the glass surface of your induction cooktop sits a copper induction coil. When electricity passes through that induction coil, it creates a magnetic field. That magnetic field excites the iron molecules inside your pan, which generates heat right inside the cookware itself.
This is different from traditional cooking methods like gas stoves or electric stoves. This is where a flame or heating element warms the air and surface first. With induction technology, energy goes straight into the pan. That is why induction cooktops heat food so fast and efficiently. The cooktop glass itself stays relatively cool to the touch, which surprises many home cooks the first time they use one.
Why Induction Cooktops Behave Differently From Gas or Electric
Because induction appliances rely on electromagnetic interaction, they are sensitive in ways that gas stoves and electric cooktops are not. The cooking zone can only detect and heat magnetic cookware. A pan made from stainless steel or cast iron works perfectly, while aluminum or glass cookware will cause the unit to behave as if no pan is present at all.
The control panel is also touch-sensitive rather than mechanical. This makes it more vulnerable to moisture, grease buildup, and certain surface conditions. Induction stoves also pull significant power. A feature making them sensitive to electrical supply issues that a traditional gas stove would never notice. These differences are the first step to solving most induction cooktop issues.
The Most Common Reasons Problems Happen
Here’s a quick overview of the top reasons induction cooktop problems occur:
| Problem Category | Common Cause |
|---|---|
| No power / won’t turn on | Tripped breaker, control lock, blown fuse |
| Not heating | Incompatible cookware, pan size too small |
| Pan not detected | Non-magnetic cookware, warped pan bottom |
| Error codes | Overheating, sensor fault, power fluctuation |
| Strange noises | Cookware vibration, fan operation |
| Keeps turning off | Auto shut-off, overheating protection |
| Touch controls unresponsive | Moisture, grease, control board fault |
Are Induction Cooktops More Prone to Issues?
Induction cooktops are not always more fragile than gas or electric stoves. But they do have more electronically sensitive components. A typical induction cooktop contains circuit boards, sensors, cooling fans, and touch-sensitive control panels. All of which can fail under the wrong conditions.
That said, countless home cooks and even commercial kitchens report this. Induction units last as long as, or longer than, traditional cooking equipment when maintained. The problems that do arise are often preventable or easily fixed with a basic reset or cookware swap.
How to Quickly Diagnose Your Induction Cooktop Issue
A Quick Checklist to Identify Your Problem Type
Before assuming your induction cooktop is broken, run through this checklist:
- [ ] Is the cooktop plugged in and is the outlet working?
- [ ] Has the circuit breaker tripped?
- [ ] Is the child safety lock or control lock activated?
- [ ] Are you using compatible, magnetic cookware?
- [ ] Is the pan large enough to cover the cooking zone?
- [ ] Is there an error code displayed on the control panel?
- [ ] Has the cooktop overheated and triggered its auto shut-off?
In my experience, more than half of all reported induction cooktop problems are solved by checking these seven things. It sounds simple, but the control lock alone is responsible for a surprising number of “my cooktop is broken” moments.
Is It a Power Issue, Cookware Issue, or Hardware Fault?
You can usually narrow the problem down to one of three categories:
Power issues — The cooktop has no power, partial power, or keeps shutting off. This points to the electrical supply, circuit breaker, fuse, or wiring.
Cookware issues — The cooktop powers on and the controls respond, but the cooking zone won’t heat. This almost always points to pan compatibility or cookware placement.
Hardware faults — Error codes appear, the cooktop makes unusual sounds, controls behave erratically, or components fail even with correct cookware and power. These point to internal components like the circuit board, induction coil underneath, or sensors.
Simple Reset Steps That Fix Many Problems Instantly
A reset clears temporary faults in the system and restores normal operation. Here’s how to reset most induction models:
- Turn the cooktop off using the control panel.
- Unplug the unit from the wall outlet (or switch off the dedicated circuit breaker).
- Wait 60 seconds, this allows capacitors to fully discharge.
- Restore power and turn the cooktop back on.
This single system cleanup step fixes a surprisingly wide range of induction cooktop issues. Many appliance repair technicians recommend this as the first step before any further troubleshooting.
Induction Cooktop Not Turning On: Step-by-Step Fixes
Why Your Cooktop Has No Power
When your induction cooktop won’t turn on at all, no display, no response, no lights, the problem is almost always upstream of the unit itself. The cooktop may be perfectly fine, but without the right electrical supply it simply cannot operate.
Induction ranges and built-in induction cooktops need a 240-volt dedicated circuit in the United States. Portable induction cooktop units use 120 volts, but still need an outlet that can handle 15–20 amps of continuous load. A circuit that can’t deliver this will trip or fail entirely.
Checking Outlets, Breakers, and Wiring
Follow these steps in order:
- Test the outlet — Plug a different appliance (like a lamp) into the same outlet to confirm it’s live.
- Check the circuit breaker panel — Look for a tripped breaker. A tripped breaker sits in the middle position, not fully on or off. Reset it by pushing it firmly to the OFF position, then back to ON.
- Inspect the power cord — On portable units, check for damage, fraying, or bent prongs.
- Check the wiring connection — For built-in induction cooktops. Loose wiring at the terminal block can cause total power failure. If you’re not comfortable working with electrical wiring, this is where you call a professional.
Control Lock and Child Safety Lock Issues
Most induction stoves include a control lock or child safety lock feature. When activated, this lock disables all touch controls, making it look like the cooktop has lost power or is broken. This is one of the most frequently misdiagnosed induction cooktop problems I’ve seen.
To unlock the controls, press and hold the lock button (often marked with a padlock icon) for 3–5 seconds. Check your model’s manual if you can’t locate the lock button, as brand-specific induction cooktop layouts vary. On some induction hobs, the lock icon will flash before deactivating.
When a Blown Fuse or Internal Fault Is Likely
If the outlet and breaker are fine and the lock isn’t activated, the next suspect is an internal fuse. Many induction units contain a thermal fuse that blows if the cooktop overheats. This is a safety feature, not a design flaw.
Replacing a blown internal fuse typically costs $10–$30 in parts. But, if the fuse keeps blowing after replacement. There may be a deeper induction cooktop problem, like a faulty circuit board or faulty induction coil, as the root cause.
Induction Cooktop Not Heating or Heating Properly
Why the Cooktop Turns On But Doesn’t Heat
This is the most common complaint among home cooks using induction technology for the first time. The display lights up, the controls respond, but the pan stays cold. In the vast majority of cases, the cause is incompatible cookware, not a faulty appliance.
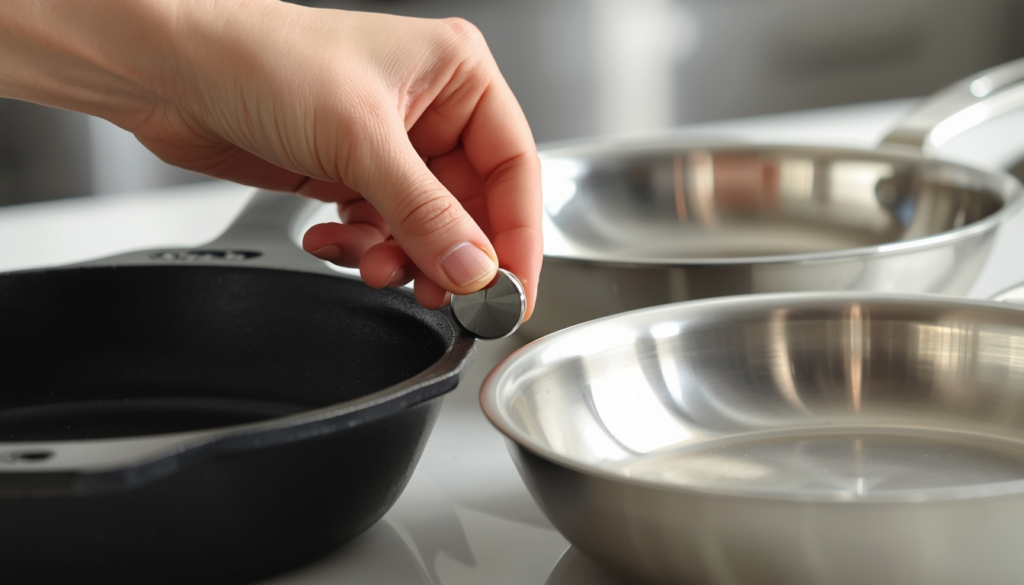
Induction technology only works with magnetic materials. If a magnet doesn’t stick to the bottom of your pan, that pan will not work on an induction stovetop. It’s that straightforward.
Causes of Weak or Uneven Heating
If your cooktop heats but inconsistently, consider these causes:
- Warped pan bottom — A pan that doesn’t sit flat on the cooking zone loses contact with the magnetic field. The result is uneven heating or widespread heating issues across the pan’s surface.
- Pan too small — Most induction cooktops need the cookware to cover at least 70% of the cooking zone diameter to trigger full heating.
- Heat settings too low — Induction cooktops respond very precisely to heat settings. If you’re used to gas stoves, your default power level may be too low.
- Thin cookware — Thin pans heat unevenly. It’s because they can’t distribute the magnetic energy evenly across the surface.
Why Heating Stops Suddenly During Cooking
If your induction cooktop works fine for 10–20 minutes and then stops heating without warning. Then overheating protection has likely activated. Every induction unit contains temperature sensors. These sensors shut down the cooking zone if internal temperatures get too high.
Blocked ventilation slots are the most common trigger. Make sure the area around and underneath your induction stove has adequate airflow. Portable induction cooktop units need at least 4 inches of clearance on all sides.
Step-by-Step Fixes for Heating Failures
| Issue | Fix |
|---|---|
| No heat at all | Check cookware compatibility with a magnet |
| Weak heating | Use flat-bottomed cookware that fully covers the zone |
| Uneven heating | Replace warped or thin cookware |
| Heating stops mid-cook | Clear ventilation, reduce heat setting |
| Heating works on some zones only | That zone’s induction coil may be faulty |
Why Your Induction Cooktop Is Not Detecting the Pan
How Pan Detection Works
Every induction hob has a detection system. It scans for magnetic cookware before activating the induction coil underneath. When you place a pan on the cooking zone, the coil sends a small test pulse of electromagnetic energy. If the cookware responds with the correct magnetic signature, the unit activates full heating. If not, the cooktop stays dormant, or shows a “no pan detected” error.
This detection system is a safety feature. It prevents the cooking zone from running with nothing on it, which would waste energy and potentially overheat the glass surface. But, it also means that pan compatibility is non-negotiable.
How to Check If Your Cookware Is Compatible
The simplest test in the world: hold a refrigerator magnet to the bottom of your pan. If the magnet sticks firmly, the cookware will work on an induction stovetop. If it doesn’t stick, or only barely clings, the pan lacks enough ferromagnetic content and will not be detected.
Compatible materials include:
- Cast iron
- Enameled cast iron
- Magnetic stainless steel (18/10 grade may not work, test first)
- Carbon steel
Non-compatible materials include:
Common Cookware Mistakes That Cause Detection Failure
Cookware placement matters more than most people realize. If the pan is positioned off-center on the cooking zone, some units won’t detect it properly. Always center your cookware over the zone markings on the glass.
Cookware size is the other major factor. If the pan diameter is too small relative to the cooking zone, the induction cooktop may not register it at all. Most manufacturers need the pan to be at least 4–5 inches in diameter, and ideally close to the zone size.
Why the Wrong Pan Can Stop Heating Completely
Using non-magnetic cookware doesn’t just result in slow heating. It can prevent heating entirely on most induction models. Some induction cooktops will display an error code or flash the cooking zone indicator to signal that no compatible pan is detected.
Repeatedly attempting to run the cooktop with incompatible cookware won’t damage the unit. But it can cause frustration and unnecessary troubleshooting time. If you’ve recently switched from gas stoves or electric cooktops. Audit your entire cookware collection before assuming the induction appliance is at fault.
Best Cookware for Induction (And What to Avoid)
Materials That Work Best (And Why)
The best induction-compatible cookware combines high magnetic content with a flat, stable bottom for most contact with the cooking zone. Here’s how the top materials rank:
| Material | Induction Compatible? | Performance Rating |
|---|---|---|
| Cast Iron | ✅ Yes | ⭐⭐⭐⭐⭐ |
| Enameled Cast Iron | ✅ Yes | ⭐⭐⭐⭐⭐ |
| Carbon Steel | ✅ Yes | ⭐⭐⭐⭐ |
| Magnetic Stainless Steel | ✅ Yes (test first) | ⭐⭐⭐⭐ |
| Aluminum (no magnetic base) | ❌ No | ⭐ |
| Copper | ❌ No | ⭐ |
| Glass Cookware | ❌ No | ⭐ |
| Ceramic (magnetic base) | ✅ Sometimes | ⭐⭐⭐ |
Cast iron and enameled cast iron are the gold standard for induction cooking. They heat evenly, keep heat well, and are detected instantly by every induction hob on the market.
How to Test Cookware at Home
You already know the magnet test. Here’s a more thorough assessment:
- Run the magnet test on the base of the pan, not the sides.
- Place the pan on the induction cooktop and set it to medium heat.
- If the cooktop activates within 5 seconds, the cookware is fully compatible.
- If it activates slowly or intermittently, the pan has borderline magnetic content and may cause issues.
- If it doesn’t activate at all, the pan is incompatible, full stop.
Budget vs. Premium Cookware Differences
Budget induction-compatible cookware (under $50) works fine for casual home cooking. But, cheaper pots and pans often use thinner gauge steel, which leads to hot spots, uneven heating, and faster warping over time.
Premium induction cookware like All-Clad, Demeyere, or Le Creuset uses heavier gauge materials with optimized flat bases. An avid cook who uses their induction stovetop daily will notice the performance difference. That said, even a $20 cast iron skillet outperforms a $200 aluminum pan on any induction cooktop.
Common Myths About Induction Cookware
Myth 1: “Induction cookware is special and expensive.” False. Any magnetic pan works. Many people already own compatible cookware without realizing it.
Myth 2: “You need to buy a completely new set of pots and pans.” Usually false. Test what you have first.
Myth 3: “Stainless steel always works on induction.” Not always. Some stainless steel grades lack enough iron content. Always test.
Touch Controls Not Working or Acting Glitchy
Why Touch Controls Stop Responding
The induction cooktop buttons on most modern units are capacitive touch sensors. The same technology used in smartphones. They detect the electrical charge from your fingertip. Anything that interferes with this interaction will cause the controls to behave erratically or stop responding.
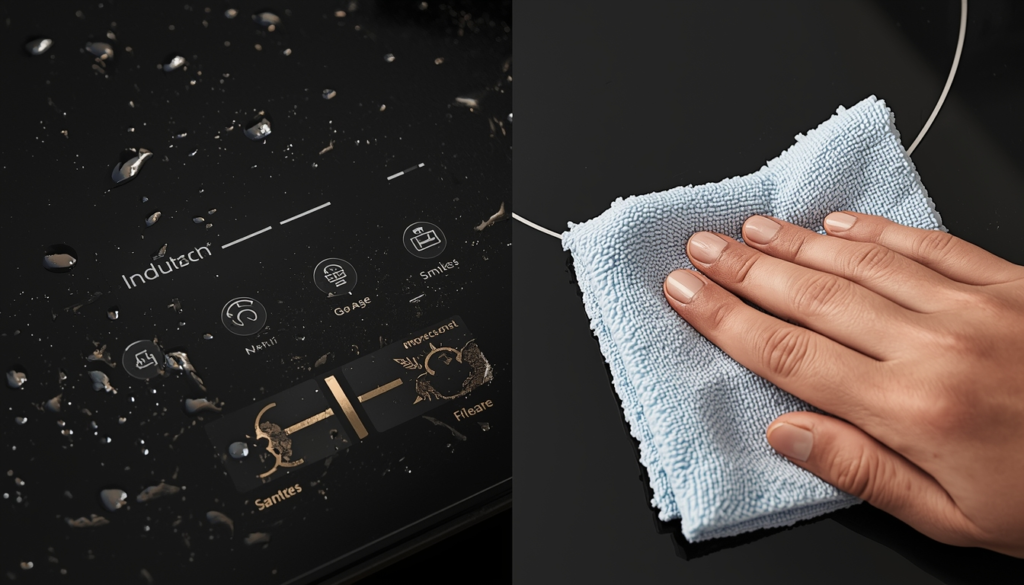
The most common culprits are moisture, grease film, and dry skin. A thin layer of cooking grease on the control panel issues a fake “signal” to the sensors, causing buttons to activate randomly or not at all. This is especially common with control panel issues on units installed directly next to a cooking zone.
How Moisture and Grease Interfere With Sensors
When steam or cooking liquids land on the touch surface. the water creates a false electrical signal across many sensor points at the same time. The cooktop interprets this as phantom touch input and either locks up or activates unintended functions.
The fix is straightforward: wipe the control panel with a dry cloth before use. For stubborn grease buildup, use a small amount of rubbing alcohol on a cloth, never spray liquids directly onto the panel. After cleaning, give the surface 30 seconds to dry fully before trying the controls again.
When the Control Panel Needs Resetting
If cleaning doesn’t restore full control function, perform a full power reset as described earlier (unplug for 60 seconds). This clears any software glitches or stuck inputs in the control panel’s microprocessor.
On some induction models, you can also start a soft reset by pressing and holding the power button for 10 seconds while the unit is on. This restarts the control software without cutting power to the display.
Signs of a Failing Control Board
If the controls remain unresponsive after cleaning and resetting, the faulty circuit board may be to blame. Signs include:
- Buttons that work intermittently with no pattern
- The display flickering or showing garbled characters
- One specific button or zone that never responds
- The whole cooktop shakes or powers off when certain controls are pressed
A faulty circuit board replacement typically costs $100–$300 in parts plus labor. On older or lower-cost induction units, this repair cost may approach or exceed the cost of a new cooktop. This makes replacement the smarter financial decision.
Induction Cooktop Error Codes Explained (With Fixes)
Why Error Codes Appear
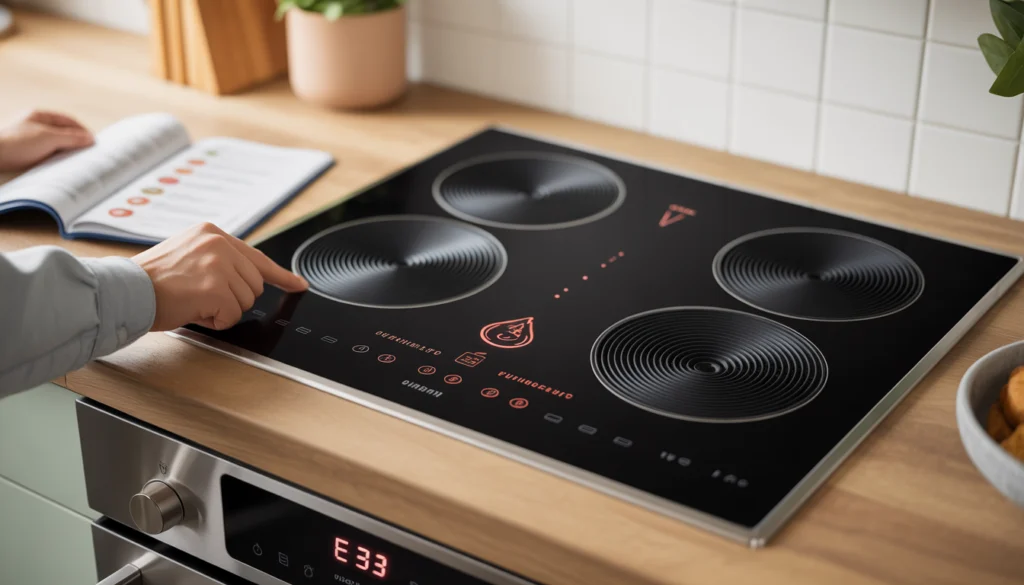
Error codes are the induction cooktop’s way of communicating that something specific has gone wrong. Rather than simply shutting off, the unit’s internal diagnostic system identifies the fault type and displays a code on the panel. This is actually one of the most helpful features of modern induction appliances compared to traditional gas stoves. Gas stoves give you no diagnostic information at all.
Error codes appear for hardware faults, safety triggers, sensor readings, or communication errors between components. Understanding what each code means tells you immediately whether you’re dealing with a quick fix or a serious repair.
The Most Common Error Codes and What They Mean
Brand-specific induction cooktop error codes vary. But these patterns are nearly universal across induction models:
| Error Code | What It Means | Fix |
|---|---|---|
| E0 / E1 | No pan detected or pan too small | Check cookware compatibility and placement |
| E2 | Temperature sensor fault | Reset the unit; call a technician if persistent |
| E3 | Overheating — internal temperature too high | Allow to cool, clear ventilation |
| E4 | Cooling fan failure | Do not use; contact a repair service |
| E5 / E6 | Voltage too high or too low | Check electrical supply; use a voltage stabilizer |
| E7 | Internal component communication error | Reset; may indicate faulty circuit board |
| E8 | IGBT (power transistor) overtemperature | Allow cooling; reduce heat setting |
When a Reset Will Fix It vs. When It Won’t
A reset is effective for transient errors. Example codes triggered by temporary overheating, brief power fluctuations, or software glitches. These include most E0, E3, E5, and E8 codes.
A reset will not fix codes caused by physical component failures. If E4 (fan failure), E2 (persistent sensor fault), or E7 (circuit board error) return immediately after a reset. Then the underlying hardware needs attention.
Brand Differences in Error Codes
Premium brands like Thermador and Wolf use their own proprietary error code systems. Often with letter-number combinations rather than simple E-codes. If you own a premium induction range from these brands and see an unfamiliar code. Thermador appliance repair and Wolf appliance repair technicians are trained for these systems.
For mainstream brands, most error codes follow the E0–E9 pattern above. Always cross-reference the error code with your specific model’s manual. Even within a single brand, different induction models can assign different meanings to the same code.
Strange Worrying Noises: Buzzing, Clicking, Humming
Why Induction Cooktops Make Noise
Here’s something that surprises a lot of new induction stove owners: induction cooking is inherently noisy. The electromagnetic field that heats your cookware also causes the metal in the pan to vibrate at a microscopic level. This vibration travels through the pan and becomes audible as a buzz or hum — especially at high heat settings.
Additionally, every induction unit contains an internal cooling fan. It runs during and after cooking to protect the electronics. This fan creates a low, consistent hum that’s completely normal and expected.
Normal vs. Abnormal Sounds Explained
Normal sounds:
- Low humming or buzzing (electromagnetic vibration in cookware)
- Clicking when the cooking zone activates or deactivates
- Fan noise during and after cooking
- Ticking as the glass surface expands and contracts with heat
Abnormal sounds:
- Loud grinding or rattling from the fan (fan blade obstruction or bearing failure)
- Crackling or popping from inside the unit (possible electrical fault)
- A noisy induction cooktop that suddenly becomes much louder than usual
- Sounds that persist after the cooktop is turned off and the fan has stopped
How Cookware Affects Noise Levels
Noisy induction cooktops are very often noisy cookware. Thin, lightweight pans vibrate more than heavy cast iron or thick stainless steel. Multi-layer pans with bonded bases can also produce a distinct hum. The reason is different metal layers vibrate at slightly different frequencies.
If you have a noisy induction stovetop, try switching to heavier cookware, particularly cast iron. In most cases, the buzzing reduces alot. Noisy induction hobs and noisy induction stovetops that quiet down with different cookware are working exactly as designed.
When Noise Signals a Serious Issue
Seek professional attention if you hear:
- Crackling, arcing, or electrical popping — possible short circuit
- Grinding fan noise — debris in the fan or bearing failure; continued use risks overheating
- Loud banging — possible component failure inside the unit
Why Your Induction Cooktop Keeps Turning Off
Built-In Safety Features That Shut Off the Cooktop
Every induction cooker on the market includes many auto shut-off features. These are not malfunctions. They are deliberate safety mechanisms built into the induction technology. Understanding them prevents unnecessary panic and prevents problems from being misdiagnosed.
The primary safety features that can interrupt cooking include overheating protection, pan removal detection, inactivity timers, and power supply monitoring.
Overheating Protection and Cooling
When the internal temperature sensors detect that the cooktop is running too hot. The unit shuts down the affected cooking zone (or the entire cooktop) to prevent damage. This is especially common if:
- The ventilation slots are blocked by nearby appliances or kitchen equipment
- The unit is installed in a tight cabinet without adequate airflow
- You’ve been cooking at maximum heat for extended periods
Allow the cooktop to cool for 10–15 minutes before attempting to restart it. If overheating keeps occurring. Check the installation clearances and ensure the cooling fan is running properly.
Auto Shut-Off Due to Inactivity or Pan Removal
Most induction hobs include an inactivity timer, typically 1–10 hours depending on the heat setting. If no pan interaction or control input is detected within this window, the cooktop shuts off automatically. This is a standard energy-saving and safety feature.
Pan removal detection is equally automatic. The moment you lift the pan off the cooking zone, the induction cooktop powers down that zone within 60 seconds. Replace the pan and the zone reactivates. This is normal behavior for all induction models.
Electrical Fluctuations and Power Interruptions
Induction cooktops are sensitive to voltage fluctuations in the electrical supply. A momentary dip or spike, from a large appliance starting up on the same circuit, for example. It can trigger the cooktop’s internal protection systems and cause an immediate shutdown.
If your cooktop keeps shutting off and none of the above apply. Consider having an electrician check your home’s electrical supply quality. In areas with unstable power. A voltage stabilizer protects the induction appliance from damage caused by inconsistent supply.
Power Supply and Electrical Issues You Shouldn’t Ignore
How Voltage Fluctuations Affect Performance
Induction cooktops use high-frequency electronics that need a stable, consistent power supply. A typical induction cooktop draws 7,000–10,000 watts during full operation. Even brief voltage irregularities, under 1 second, can disrupt the internal circuit. Thereby causing error codes, shutdowns, or reduced heating performance.
In the United States, induction ranges are wired to a 240-volt, 40–50 amp dedicated circuit. Any deviation from this spec will negatively affect performance and can shorten the appliance’s lifespan.
Signs of Wiring or Installation Problems
Watch for these warning signs of electrical issues behind your induction cooktop problems:
- Circuit breaker trips repeatedly when the cooktop is in use
- Flickering or dimming lights in the kitchen when the cooktop powers up
- Burning smell from the outlet or wiring behind the unit
- Cooktop fails to reach full power even on the highest heat settings
- The cooktop works fine at low power but shuts off at high heat
Any of these signs warrant an inspection by a licensed electrician before you continue using the appliance.
When Electrical Issues Become Dangerous
Electrical faults behind an induction stovetop can be genuinely dangerous. Unlike gas stoves where a gas leak is the primary hazard. Induction appliance electrical issues carry risks of shock, fire, and permanent appliance damage.
Never attempt to repair internal wiring yourself unless you are a licensed electrician. The capacitors inside an induction unit can hold a dangerous charge even when the unit is unplugged.
Basic Safety Checks Homeowners Can Do
These checks are safe for any homeowner:
- Verify the circuit breaker is the correct amperage for the cooktop (check the cooktop’s nameplate).
- Inspect the visible power cord and outlet for damage or discoloration.
- Ensure the cooktop is on a dedicated circuit, not shared with a refrigerator, oven, or other major appliance.
- Test the outlet voltage with an inexpensive multimeter (or have your electrician do it).
Everyday Mistakes That Cause Induction Cooktop Problems
Using the Wrong Cookware Repeatedly
The single most damaging habit for your induction cooktop is repeatedly using non-magnetic cookware or incompatible cookware. One attempt with the wrong pan won’t damage anything. Repeated attempts force the unit’s detection system to cycle on and off rapidly. This adds unnecessary wear to the electronics.
If many people use the kitchen. Label your induction-compatible cookware or store incompatible pots and pans separately to avoid confusion.
Dragging Pans and Damaging the Surface
The glass ceramic surface of an induction hob is durable but not indestructible. Dragging heavy cast iron pans across the surface creates micro-scratches that compound over time. Deep scratches can eventually interfere with the cooking zone sensors underneath.
Always lift pans when repositioning them. Never slide or drag. This single habit dramatically extends the life of the induction cooktop glass.
Letting Spills Interfere With Sensors
Spills on an induction cooktop are less hazardous than on gas stoves because the surface doesn’t get as hot. But, sugary spills are an exception. They can bond to the glass surface as they cool and are very difficult to remove without scratching if left too long.
Clean spills immediately after the surface cools to a safe temperature. Food residue that migrates toward the edge of the cooking zone can interfere with the detection sensors over time. It can cause intermittent pan detection failure.
Blocking Ventilation or Overheating the Unit
Many kitchen installations place the induction cooktop below overhead cabinets or next to other cooking equipment. If the ventilation slots on the sides or bottom of the unit are partially blocked. The cooling system can’t maintain safe internal temperatures, leading to repeated overheating shutdowns.
Check your installation manual for minimum clearance requirements. As a general rule, leave at least 2–4 inches of clearance on all ventilation sides.
Ignoring Small Warning Signs
A single error code that clears on its own is worth noting but not panicking about. Yet, if you see the same error code recurring across many cooking sessions, that’s a pattern. Patterns show a developing fault. Ignoring small warning signs almost always leads to more expensive repairs down the line.
Keep a simple mental log: if any induction cooktop issue happens more than twice, it deserves attention.
How to Maintain an Induction Cooktop for Long-Term Performance
Daily and Weekly Cleaning Routine
Consistent maintenance is the simplest way to prevent induction cooking issues before they start. Here’s a routine that keeps any induction cooktop in top shape:
After every use:
- Wipe the glass surface with a damp microfiber cloth once it’s cooled.
- Clean the control panel with a dry cloth to remove any grease or moisture.
Weekly:
- Use an induction cooktop cleaner or a small amount of ceramic cooktop cleaner to remove residue.
- Check and clear ventilation slots of any dust buildup.
- Inspect the power cord (on portable units) for any damage.
Safe Cleaning Products to Use
| Safe to Use | Avoid |
|---|---|
| Microfiber cloths | Steel wool or abrasive pads |
| Ceramic cooktop cleaner | Bleach-based cleaners |
| Distilled white vinegar (diluted) | Oven cleaner sprays |
| Baking soda paste (for stubborn spots) | Hard plastic scrapers |
| Soft silicone scraper | Metal spatulas on the glass |
Never use harsh abrasives on the induction cooktop glass. Even minor scratches accumulate and can eventually affect sensor performance.
How to Avoid Scratches and Cracks
Beyond lifting rather than dragging cookware, a few other habits protect the glass surface:
- Don’t place the cooktop under heavy items that could crack the glass if they fall.
- Avoid thermal shock, don’t place cold water or ice directly on a hot cooking zone.
- Use a silicone mat under your cookware if you’re concerned about the surface (check that it doesn’t block heat transfer).
Maintenance Habits That Extend Lifespan
The three habits that have the biggest long-term impact on induction appliance longevity:
- Always use flat-bottomed, compatible cookware. It reduces stress on detection sensors and induction coils.
- Keep ventilation clear. It prevents overheating. The leading cause of premature circuit board failure.
- Address error codes promptly. A minor fault caught early rarely becomes a major repair.
How Long Induction Cooktops Last (And When to Replace)
Average Lifespan of Induction Cooktops
A quality induction cooktop should last 10–15 years with proper maintenance and normal use. Some top induction ranges from brands like Thermador or Wolf are designed to last 20+ years in both home kitchens and industry kitchens.
Portable induction cooktop units and budget single induction cooktop models have shorter lifespans, closer to 5–8 years. It’s because they use lower-grade components designed for lighter use.
Signs Your Cooktop Is Wearing Out
- Cooking zones that worked reliably begin to fail intermittently
- Error codes that weren’t present before appear regularly
- Heating that was once fast becomes noticeably slower
- The cooktop requires more frequent resets to function
- Visible cracks or deep scratches in the glass ceramic surface
Repair vs. Replace Decision Guide
Use this simple framework:
If repair cost > 50% of replacement cost → Replace
| Repair Needed | Estimated Cost | Recommendation |
|---|---|---|
| Blown internal fuse | $15–$50 | Repair |
| Faulty temperature sensor | $50–$150 | Repair |
| Circuit board replacement | $150–$400 | Evaluate (check cooktop age) |
| Cracked glass surface | $100–$300 | Evaluate |
| Multiple simultaneous faults | $300–$600+ | Replace |
When Upgrading Makes More Sense
If your induction cooktop is over 8 years old and requires a major repair. Upgrading to a new induction cooktop often makes more financial sense than repairing. Modern induction appliances are more energy efficient than models from 10 years ago. The new models include better safety features, improved control panels, and more precise heat settings.
A new classic induction cooktop from a reputable brand starts around $300–$500. A premium induction range from a top-tier brand runs $1,500–$4,000+.
When to Call a Professional (And When You Can Fix It Yourself)
Problems You Can Safely Fix at Home
These induction cooktop repairs are safe for any homeowner with basic DIY skills:
- Resetting the cooktop after a tripped breaker or error code
- Replacing a blown internal fuse (once power is fully disconnected)
- Cleaning the control panel and glass surface
- Checking and adjusting cookware to match compatibility requirements
- Testing and resetting the circuit breaker
- Clearing ventilation blockages
Warning Signs That Need a Technician
Do not attempt DIY repair in these situations:
- Any burning smell from inside the unit
- Sparking, arcing, or visible scorch marks on the cooktop
- An error code that returns immediately after every reset
- A faulty induction coil or circuit board replacement
- Any internal wiring repair on a hardwired unit
These situations need a qualified appliance repair technician. Companies like Mr. Appliance offer kitchen appliance repair services nationwide. They are familiar with most induction models. Manufacturer-certified technicians (such as Thermador appliance repair or Wolf appliance repair specialists) are worth the extra cost.
What to Expect From a Repair Service
A professional appliance repair visit includes a diagnostic fee of $75–$150, which is often credited toward the repair if you proceed. The technician will identify the root cause, provide a written repair estimate, and source any required parts.
Cooktop repair costs vary widely depending on the fault. Simple fixes like sensor replacement or fuse replacement cost $100–$200 all-in. Complex induction cooktop repair involving the circuit board or induction coil can run $300–$500 or more.
How to Avoid Unnecessary Service Calls
Before calling a professional:
- Complete the full diagnostic checklist at the start of this guide.
- Perform a power reset (unplug for 60 seconds).
- Confirm your cookware is fully compatible.
- Check for and document any error codes.
- Search your model number + error code online. Many brand-specific induction cooktop issues have documented solutions.
If all the above fail to resolve the problem, you’ve done due diligence and a professional call is the right next step.
FAQs About Induction Cooktop Problems
Why Is My Induction Cooktop Not Working Sometimes?
Intermittent induction cooktop problems are usually caused by one of three things:
- Borderline-compatible cookware (especially stainless steel pans with low iron content).
- Electrical supply inconsistencies.
- A developing fault in the temperature sensors or circuit board.
Start by testing cookware with a magnet and checking for recurring error codes.
Why Does My Cooktop Make Buzzing Noises?
Buzzing is the most common and least serious of all induction cooktop issues. It’s caused by the electromagnetic field vibrating the metal in your cookware. Heavier, thicker pans, especially cast iron, buzz alot less than lightweight aluminum-base cookware. If the buzzing is very loud or coming from inside the unit rather than the pan, it may show a fan or component issue.
What Are the Main Disadvantages of Induction Cooking?
The primary disadvantages are cookware compatibility. You must use magnetic pots and pans. They have a higher upfront cost compared to basic electric stoves, and sensitivity to power supply quality. Some cooks also find the learning curve steeper than traditional cooking methods. Particularly when adjusting to how quickly induction technology changes heat levels.
Can Induction Cooktops Be Repaired Easily?
Many induction cooktop issues are easy to fix at home, particularly anything related to cookware, settings, or basic resets. Internal component repairs (circuit board, induction coil, sensors) need a professional. But are generally within the skill set of any qualified appliance repair technician. The repairability depends heavily on the age and brand of the unit.
Do Induction Cooktops Use More Electricity?
No, induction cooktops are actually more energy efficient than both gas stoves and traditional electric cooktops. Because energy transfers to the cookware rather than to the air and surface first, induction cooking loses very little heat. Most induction units operate at 85–90% energy efficiency, compared to 40–55% for gas stoves. Your electricity bill may actually decrease after switching from gas to induction.
Conclusion
Induction cooktops are highly efficient and reliable, but they can feel confusing when problems arise. The good news is that most issues, like no heating, pan detection failures, or unresponsive controls, are easy to diagnose and fix with basic checks. Knowing how induction technology works gives you a major advantage in troubleshooting quickly.
Use compatible cookware, keep the surface clean, and ensure proper ventilation. You can prevent most problems before they start. When something more serious appears. Knowing the warning signs helps you decide when to call a professional. It will save both time and money in the long run.
Looking for more kitchen appliance guidance? Check out our related guides on choosing the right cookware for your kitchen, how to clean a glass cooktop without scratching it, gas vs induction vs electric, which is best for you, how long kitchen appliances should last, and energy-efficient cooking methods that lower your bills.