
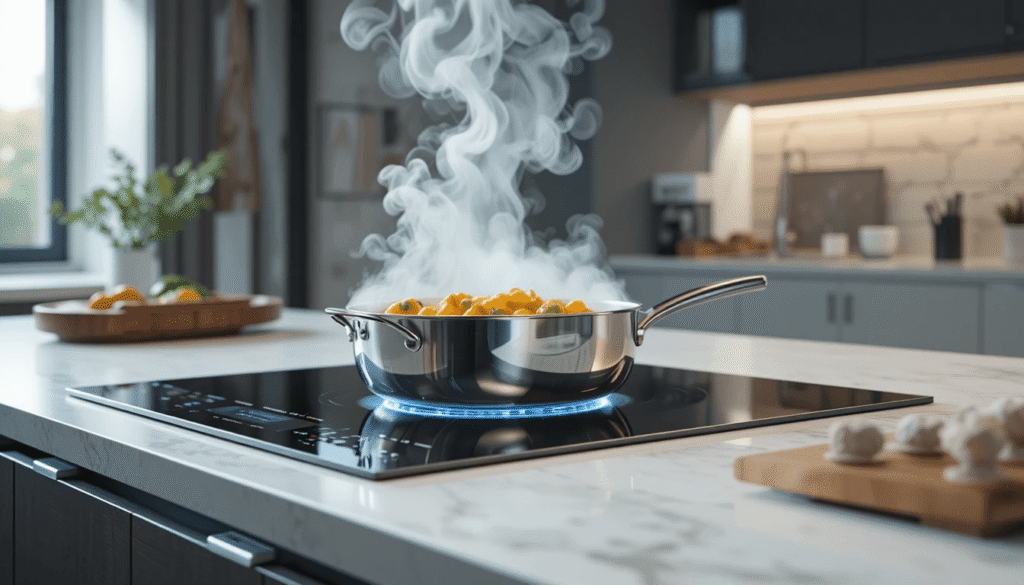
If you’ve ever wondered how to control temperature in an induction cooker, you’re not alone. Induction cooking is one of the most precise and energy-efficient cooking methods available today. But the heat settings can feel confusing at first.
You need to understand how induction heating works. You’ll then have a better temperature control than any gas stove or electric stovetop can give you. This guide walks you through everything, from choosing the right cookware to mastering power levels for every meal.
Key Takeaways:
- Induction uses power levels, not exact temperatures, in most models
- Only magnetic cookware works, use the magnet test to check
- Heat responds instantly, so adjust in small steps to avoid burning
- Match pan size to cooking zone for efficiency and even heat
- Boost mode is for boiling only, not everyday cooking
- A food thermometer helps dial in precise cooking temperatures
- Keep the glass surface clean for consistent performance
What Is Induction Cooking and Why Does It Heat Differently?
What Makes Induction Different from Gas and Electric Cooktops
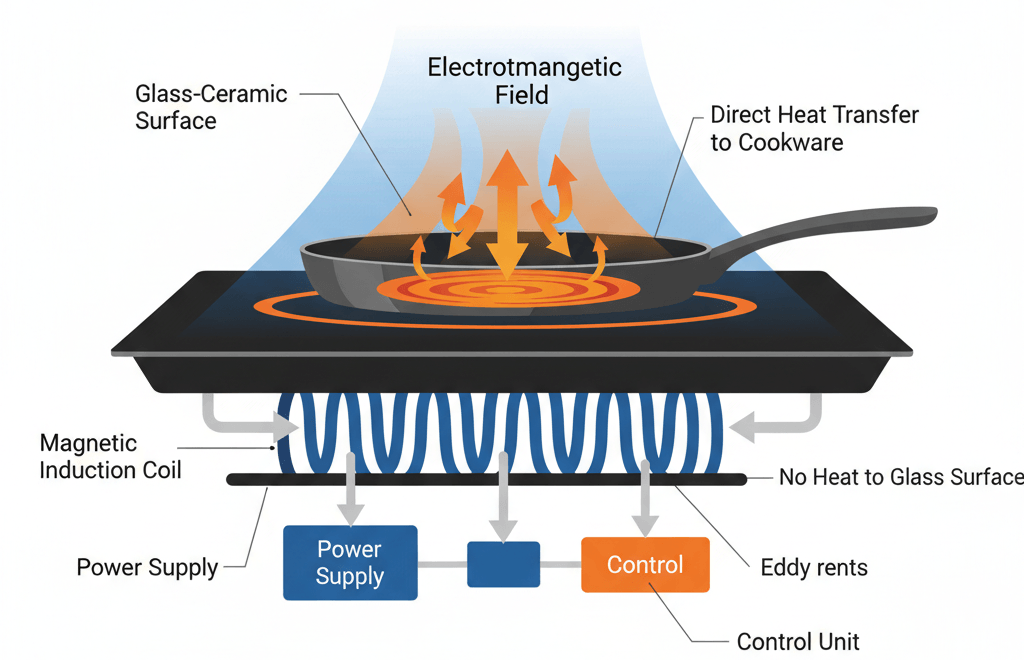
An induction stove does not use an open flame or a glowing heating element. Instead, it uses a magnetic heating coil beneath a ceramic glass cooktop surface to create a magnetic field. That field directly heats the pan itself, not the surface below it. This is called rapid heat transfer. It’s what makes induction cookers faster and more responsive than traditional cooking methods.
Gas stoves heat from a flame below the pan. Electric stoves use a heating element that warms up slowly. With induction, the heat goes straight into your cookware. That means faster boil times, quicker temperature changes, and less wasted energy.
Why Induction Heats Faster But Can Burn Food Quickly
Because induction heats cookware directly, the pan temperature rises very fast. If you’re used to cooking on a gas stove, this speed can catch you off guard. A pan that would take 3–4 minutes to get hot on a gas burner can be scorching in 60–90 seconds on an induction cooktop.
This is exactly why temperature control matters so much with induction. You need to track heat changes and adjust heat quickly. The good news? Induction responds instantly when you lower the setting. It’s much faster than electric stoves, which hold heat in the heating element long after you turn it down.
Does Induction Use Temperature or Power Levels?
Here’s one of the most common points of confusion for home cooks: most induction cooktops don’t use direct temperature settings. They use power levels, usually numbered 1–9 or 1–10. Some premium models do offer a specific temperature mode. But most standard induction cookers control how much magnetic energy is sent to the pan, not the exact cooking temperature.
Think of it like a dimmer switch for heat. Power level 3 sends less energy to the heating coil; power level 8 sends a lot more. The resulting temperature in the pan depends on the cookware material, pan thickness, and what’s inside the pan.
Why Heat Changes Instantly When You Adjust Settings
One of the biggest advantages of an induction cooker is its instant response. When you lower the power level, the magnetic field weakens immediately. Your pan cools down fast, unlike a ceramic cooktop or electric coil, which stays hot for minutes after you lower the setting.
This “fast-cooling induction cooktop” behavior is very useful. You will enjoy it when cooking delicate foods like eggs or sauces that burn easily. You can reduce heat in real time without waiting.
Is Induction Cooking Harder to Control for Beginners?
For beginners, induction cooking has a small learning curve. The speed and responsiveness feel different from a gas stove. But most home cooks find that good temperature control actually becomes easier with practice. This is because the heat responds so quickly to every change you make.
Do You Need Special Cookware for Induction?
What Cookware Works on Induction and Why Magnetism Matters
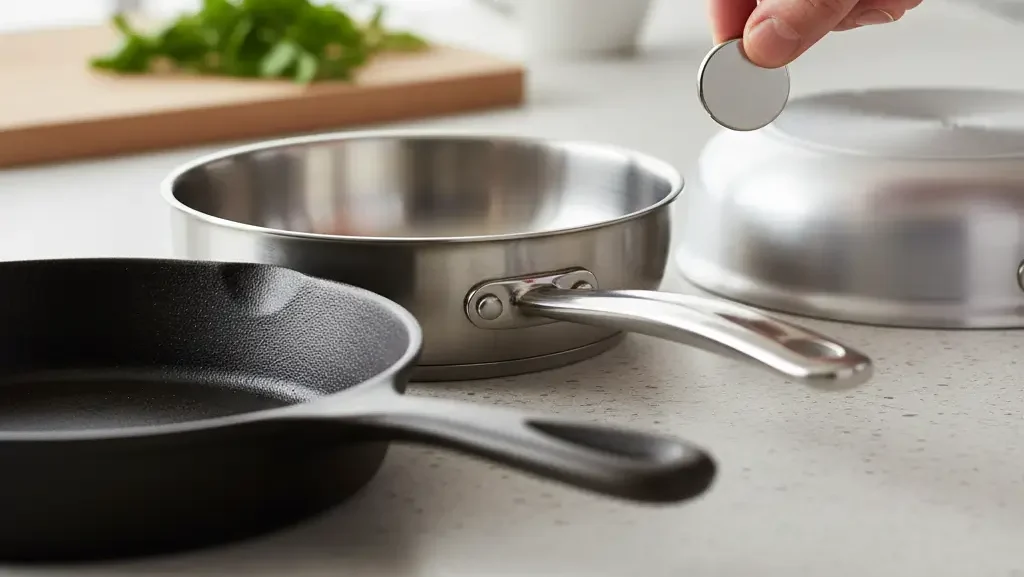
Induction cooking requires magnetic cookware. The heating coil creates a magnetic field, so the pan must contain iron or another magnetic metal to absorb that energy. Not all pots and pans work. Copper cookware, aluminum pans, and some stainless steel pans are not induction compatible. That is unless they have a magnetic base layer.
Here’s a quick breakdown of compatible and incompatible materials:
| Cookware Material | Induction Compatible? |
|---|---|
| Cast iron | ✅ Yes |
| Induction-ready stainless steel | ✅ Yes |
| Carbon steel | ✅ Yes |
| Enameled cast iron | ✅ Yes |
| Plain aluminum | ❌ No |
| Copper cookware | ❌ No |
| Glass or ceramic | ❌ No |
| Non-stick cookware (with magnetic base) | ✅ Usually yes |
How to Test Your Current Pots and Pans at Home
Testing induction cookware compatibility is easy. Hold a magnet to the bottom of your pan. If the magnet sticks firmly, your pan will work on an induction stove. If it slides off or doesn’t stick at all, that pan won’t work.
You can find this magnet test mentioned in induction cooker manuals. It takes about 5 seconds and saves a lot of frustration.
What Happens If Cookware Is Not Compatible
If you place an incompatible pan on an active cooking zone, the induction cooktop simply won’t heat up. Most induction cooktops display an error code or a “no pan detected” message. Nothing dangerous happens, the cooktop uses over-temp protection and pan detection to stay safe.
If you lift cookware off the surface while it’s cooking, the heating stops within seconds. This is a built-in safety feature, not a malfunction.
Best Cookware Materials for Precise Temperature Control
For precise temperature control, the best induction cookware is thick-bottomed stainless steel or cast iron. Thick pans distribute heat evenly across the cooking surface, reducing hot spots. Thin pans heat unevenly, which creates a temperature gradient across the bottom, some areas get too hot while others stay cooler.
Non-stick cookware is fine for everyday cooking, but avoid using it on high power levels. High heat can damage the non-stick coating over time.
Does Pan Thickness Affect Heat Control and Stability?
Yes, pan thickness has a major impact on consistent temperature. A thick cast iron pan holds heat longer and more evenly than a thin black pan. This makes thick pans ideal for searing meat or maintaining a constant temperature during slow cooking.
Thin pans respond faster to temperature changes. Useful for stir-frying or quick sautéing but can make it harder to hold a steady heat setting.
Can Warped or Uneven Pans Affect Cooking Results?
Absolutely. A warped pan doesn’t sit flat on the cooking zone, which means the magnetic field can’t transfer energy evenly. You’ll get uneven cooking, longer heat-up time, and poor performance. Always use flat-bottomed cookware on induction hobs.
If you drop cookware on a glass cooktop repeatedly, it can warp over time. Use caution when placing and removing heavy pans.
How to Set Up an Induction Cooktop for the First Time
How to Turn On an Induction Cooktop (Step-by-Step)
Setting up a new induction range for the first time is simple. Here’s what to do:
- Place the cooktop on a flat, stable surface away from water
- Plug it in (portable induction cookers use a standard outlet; built-in models are hardwired)
- Place a compatible pan on the active cooking zone
- Press the power button, most models won’t activate without a pan present
- Select your desired cooking mode or power level
- Adjust heat using the + and – buttons or a dial
Most modern induction cooktops display current power level and a timer on their digital display. Some smart induction cooker models also show estimated temperatures.
How to Choose the Right Cooking Zone
Most induction cooktops have 2–4 cooking zones. Match the size of the cooking zone to your pan. If you use a small pan on a large zone, some of the magnetic field won’t be absorbed, leading to inefficiency and longer heat-up time.
Dual cooking zones are available on some induction stovetop ranges. It allows you to connect two burners for use with a griddle or large roasting pan.
Why Your Cooktop Won’t Start (Pan Detection Explained)
If your induction cooker won’t start, the most common reason is pan detection failure. The cooktop’s temperature sensor checks for a compatible pan before activating the heating coil. No magnetic pan = no heat.
Check that your cookware is induction compatible using the magnet test. Also make sure the pan is centered on the cooking zone and that there’s no debris on the cooktop surface between the pan and the glass.
Understanding Symbols, Buttons, and Digital Displays
Most induction hobs use universal symbols:
- +/– buttons: Increase or decrease power level
- 🔒 Lock symbol: Child safety lock
- ⏱ Timer: Sets auto-shutoff
- 🔥 Boost/Turbo: Maximum power mode
- Thermometer icon: Temperature mode (on select models)
Reading your specific model’s manual is always a good idea. Different cooktop models use slightly different layouts.
Built-In Safety Features You Should Know Before Cooking
Modern induction cookers include several important safety features:
- Over-temp protection: Shuts off if the cooktop overheats
- Residual heat indicator: Warns you the surface is still hot after cooking
- Auto-shutoff: Turns off if no adjustments are made for a set time
- Pan detection: Won’t heat without compatible cookware
- Child lock: Prevents accidental setting changes
These features make induction one of the safest kitchen appliances available for home cooks with children.
Step-by-Step: How to Use an Induction Cooktop
Step 1: Place Cookware Correctly
Center your pan on the cooking zone. Make sure the bottom is flat and the pan is large enough to cover the zone. Full cookware contact ensures proper heat transfer and consistent cooking results.
Step 2: Select the Cooking Zone and Power Level
Press the zone selector to choose your active cooking zone. Then use the power buttons to set your desired heat level. Start lower than you think you need, induction heats fast. You can always increase from there.
Step 3: Start Heating and Tracking Changes
Watch your pan for the first minute. Induction heats cookware much faster than gas or electric stoves. If you smell food burning or see smoke, lower the power level immediately.
Step 4: Adjust Settings During Cooking
Don’t set it and forget it, especially early on. Most cooking requires adjusting heat at different stages. Bring water to a boil on high, then lower heat to maintain a simmer. Brown meat on high, then reduce to finish cooking.
Step 5: Turn Off and Cool Down Safely
Press the power button or zone off button when done. The cooktop surface may still be warm from the pan’s residual heat, the residual heat indicator will alert you. Always let the surface cool before cleaning.
How to Use Timers and Preset Cooking Modes
Most induction cooktops have a built-in timer you can set in minutes. Some smart induction cooker models include preset cooking modes. They can range from boiling, frying, simmering to slow cooking. These modes automatically adjust heat to match the desired cooking mode.
Using timers is especially helpful to prevent boil-overs or burning while multitasking.
What to Do If the Cooktop Turns Off Unexpectedly
Most unexpected shutoffs are caused by:
- The cooking zone timed out after inactivity
- A pan was lifted off the surface
- Overheating triggered the over-temp protection
- A power interruption
Check the display for an error code. Most codes are explained in your manual. Often, a simple reset fixes the issue.
How Temperature Control Works on Induction Cooktops
Power Levels vs Temperature: What’s the Difference?
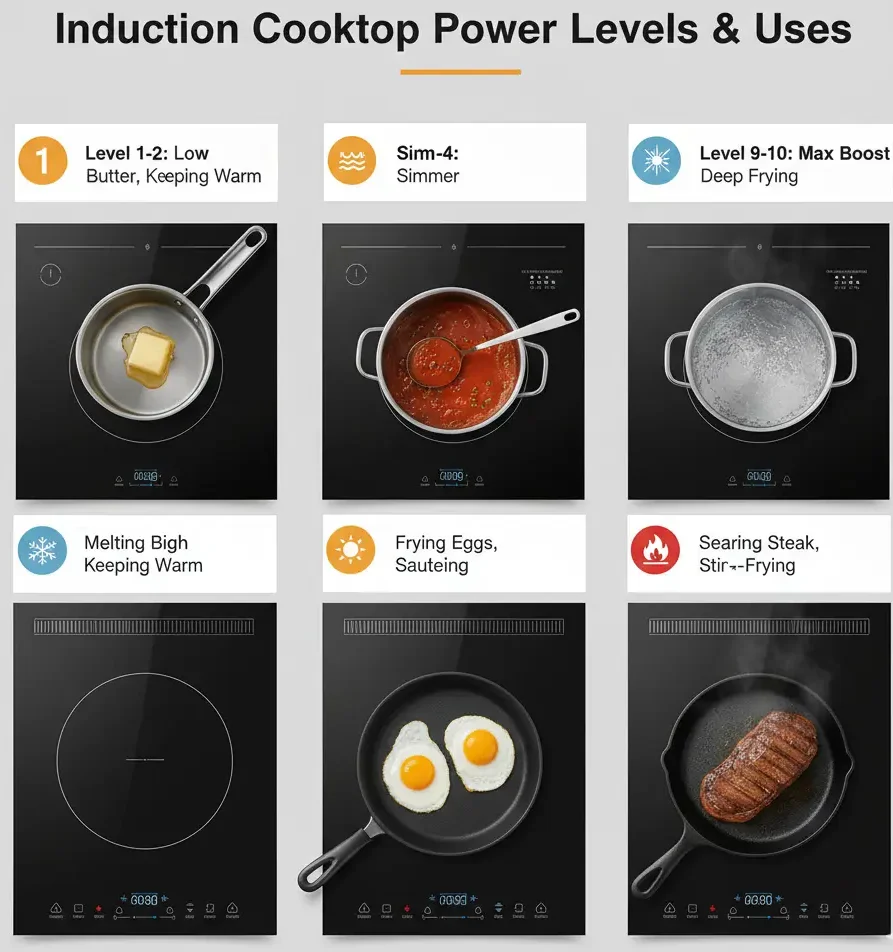
Power levels measure how much energy the heating coil sends to the pan. Temperature is the actual heat level inside the pan. These are related but not the same thing.
Here’s a helpful comparison table:
| Power Level | Approximate Heat Range | Best Used For |
|---|---|---|
| 1–2 | ~100–140°F (38–60°C) | Keeping food warm |
| 3–4 | ~140–250°F (60–120°C) | Gentle simmering |
| 5–6 | ~250–375°F (120–190°C) | Sautéing, frying eggs |
| 7–8 | ~375–450°F (190–232°C) | Stir-frying, searing |
| 9–10 | ~450°F+ (232°C+) | Boiling, high-heat frying |
Note: Actual temperatures vary by pan material, thickness, and contents.
Why Induction Doesn’t Show Exact Temperatures (In Most Models)
Most induction cooktops don’t display a specific temperature. This is due to the pan temperature changes based on many variables. The type of cookware, whether it’s empty or full, and what’s cooking inside all affect the final heat level. A standard induction controller measures power output, not pan temperature directly.
Some top-tier induction cookers include a temperature sensor. This sensor can read pan temperature more accurately. These are called precision temperature control models. They’re popular with home cooks who bake or candy-make.
How Power Levels Translate to Real Cooking Heat
This is where experience matters most. Over time, you’ll learn that:
- Power level 2 is great for melting butter without browning
- Power level 5 is perfect for scrambled eggs
- Power level 8 gets a pan hot enough for a proper sear
A cooking thermometer or food thermometer can help you measure pan temperature while learning your cooktop’s behavior. This is especially useful when following cookbooks with specific temperature settings.
What “Low, Medium, High” Really Mean on Induction
Many induction hob models label zones simply as low, medium, and high. On a 9-level scale:
- Low = levels 1–3
- Medium = levels 4–6
- High = levels 7–9
Use this as a general guide. Every cooktop model behaves slightly differently, so calibrate based on your cooking results.
Why Heat Feels Stronger Compared to Gas or Electric
Many home cooks switch to induction and immediately notice that the same “medium” setting feels hotter than it did on their old gas stove. This happens because induction delivers direct heat to the pan, there are no thermal losses to the surrounding air. All that energy goes straight into cooking.
This efficiency is great for speed and energy savings. But it also means you’ll typically cook at lower power levels than you’re used to.
Do All Induction Cooktops Control Temperature the Same Way?
No. Different cooktop models handle temperature differently. A simple induction cooker with 5 power levels gives you less control than a smart induction cooker with 10 levels and a built-in temperature sensor. Induction stovetop ranges for professional kitchens often include tempcook induction technology. It holds a very precise temperature for extended periods.
When shopping for a new induction range, look for models with at least 9 power levels and a boost mode.
How to Adjust Temperature Without Burning Food
How to Increase and Decrease Heat Smoothly
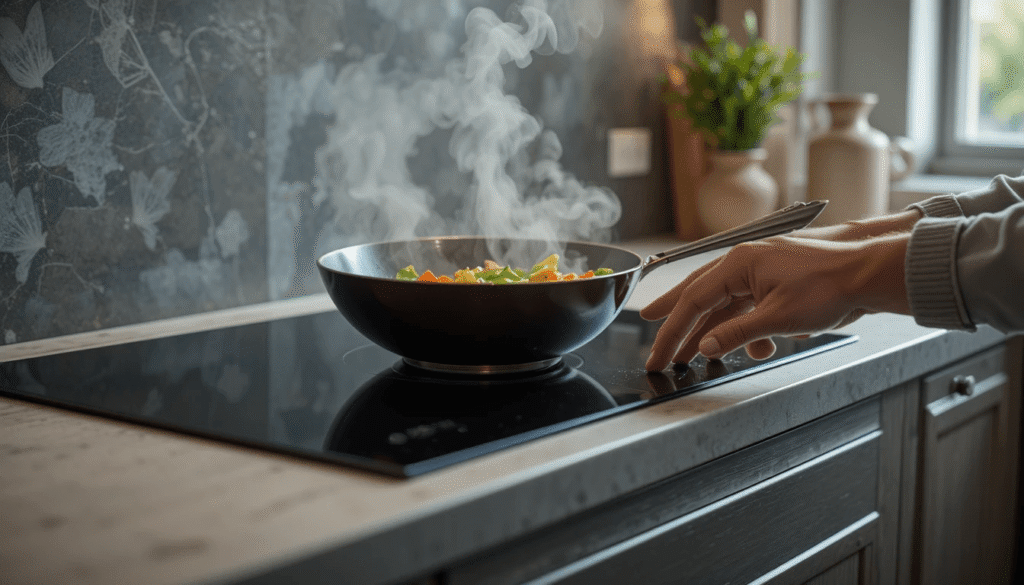
Don’t jump from power level 3 to power level 9 in one move. Increase heat in small steps, one or two levels at a time. This gives your cookware time to adjust and prevents food from scorching. The same applies when lowering heat: step down gradually for more consistent cooking.
When to Lower Heat to Avoid Burning
Lower heat immediately if you see or smell any of these:
- Smoke rising from the pan
- Food turning dark brown too quickly
- Sauce bubbling violently instead of simmering
- Oil starting to shimmer and smoke
Dropping cookware temperature quickly is one of induction’s greatest strengths. Use it.
How to Recover If Food Starts Cooking Too Fast
If your food is cooking faster than expected, lower the power level immediately. You can also briefly lift cookware off the surface, the heating stops instantly. Then replace the pan and continue at a lower setting.
This trick is especially useful for sauces, custards, or any dish that needs a very consistent temperature.
How to Preheat Pans Properly on Induction
Preheating is important for good results, especially with stainless steel pans. Set your induction cooker to medium (level 4–5) and let the pan heat for 60–90 seconds before adding oil or food. This prevents sticking and helps you achieve even browning.
Don’t preheat an empty non-stick pan on high. It can reach pan-melting temps and damage the coating.
Should You Start High and Then Reduce Heat?
For boiling water or bringing soups to temperature, yes. Start high and reduce once you hit your target. For proteins and delicate foods, it’s usually better to start at the correct temperature and stay there. The approach depends on what you’re cooking.
How to Maintain Steady Heat for Consistent Cooking
To hold a constant temperature, keep the lid on when possible. Cookware lids trap steam and help maintain steady internal heat. This is especially useful for simmering or slow cooking on induction.
Avoid opening the lid repeatedly. Each time you do, you let heat escape and the cooktop has to work harder to recover.
What Power Level Should You Use for Different Foods?
Best Heat Settings for Boiling Water Quickly
For faster boil times, use boost mode or the highest power level. A full pot of water can reach boiling on induction in 4–6 minutes — much faster than gas or electric stoves. Once boiling, reduce to level 6–7 to maintain a rolling boil without water boil-overs.
Ideal Levels for Simmering Soups and Sauces
Simmering requires low, consistent heat. Usually power level 2–4. You want small, lazy bubbles at the surface, not a rolling boil. Stir occasionally and adjust heat as needed. Induction makes it easy to hold a precise simmer for long periods without burning the bottom of the pan.
How to Control Heat When Frying Eggs or Meat
- Fried eggs: Level 3–4 for runny yolk; level 5 for fully set
- Searing steak: Preheat pan on level 8, then sear for 2–3 minutes per side
- Chicken breast: Start on level 7, then reduce to 5 to cook through
Using a food thermometer helps verify that meat has reached recommended temperatures for safe eating.
Stir-Frying: Managing Rapid Heat Changes
Stir-frying in a wok or large frying pan requires quick temperature changes. Start on level 8–9 to get the pan very hot. Add oil and ingredients quickly. Toss constantly and adjust heat between 6–9 as needed. Induction’s fast response time makes it ideal for this cooking method.
Cooking Delicate Foods Without Overheating
For eggs, cream sauces, chocolate, or fish, use power level 2–4. The key is patience. Low and slow gives you more control and far better results than trying to rush delicate foods with high heat.
Slow Cooking on Induction: Is It Possible?
Yes, many induction cooktops have a “keep warm” or “slow cook” setting. Use power level 1–2 for slow simmering over several hours. Use a lid to trap moisture and prevent the dish from drying out. While a dedicated slow cooker gives you more precise control, induction does the job well.
How to Use Advanced Features for Better Control
What Is Boost Mode and When Should You Use It?
Boost mode (also called turbo or power boost) sends maximum energy to the cooking zone, typically 3,000–3,500 watts. Use it for:
- Boiling large pots of water
- Quickly heating a pan for searing
- Bringing a large pot of soup to temperature fast
Don’t use boost mode for delicate foods or anything that can burn quickly.
How Timers Improve Cooking Accuracy
Built-in timers prevent common mistakes like forgetting food on the stove or letting water boil dry. Set a timer when cooking pasta, steaming vegetables, or simmering sauces. Most induction cooktops will beep and shut off automatically when the timer ends.
Timers are especially useful for home cooks who multitask in the kitchen.
Using Temperature Presets (If Available)
Some smart induction cooker and top-tier induction cooker models include preset temperatures for common tasks:
| Preset | Approximate Temperature |
|---|---|
| Warm | 140°F (60°C) |
| Simmer | 190°F (88°C) |
| Fry | 350°F (177°C) |
| Boil | 212°F (100°C) |
These presets make it easier to hit the desired cooking temperature without guessing.
Smart Induction Features and Auto-Adjustments
High-end induction ranges include sensors that can automatically adjust heat based on what’s happening in the pan. Some detect when water is about to boil and reduce heat automatically to prevent boil-overs. Others maintain a consistent temperature using a feedback loop between the temperature sensor and the heating coil.
This induction controller technology is advancing quickly, especially in European and Asian markets.
When NOT to Rely on Automatic Settings
Auto-settings are a starting point, not a replacement for skill. If you’re cooking a new recipe or using unfamiliar cookware, manually check heat and adjust as needed. A cooking thermometer is always more reliable than an estimated reading from a temperature sensor.
Why Is Your Induction Cooktop Not Heating Properly?
Why Your Cooktop Turns On But Doesn’t Heat
If the display lights up but the pan doesn’t get hot, the most likely issue is incompatible cookware. Run the magnet test on your pan. Also check that the pan is large enough, most cooking zones need a pan at least 4–5 inches in diameter.
Why Heat Keeps Cutting Out During Cooking
Intermittent shutoffs are usually caused by:
- The cooktop overheating (clean the ventilation slots)
- A loose pan triggering pan detection repeatedly
- Power fluctuations in your home’s electrical system
If the problem continues, check your cooktop’s error codes or consult the manual.
Uneven Cooking: Causes and Fixes
Uneven cooking happens when:
- The pan is warped or not flat
- The cookware doesn’t cover the zone well
- The heating coil is partially damaged
Use flat-bottomed induction-compatible cookware and match pan size to zone size for the most even results.
Why Food Burns Even on Low Settings
If food burns on low settings, your pan may be too thin. Thin pans heat unevenly and can develop very hot spots. Switch to thicker cookware, like cast iron or thick-bottomed stainless steel. You can also try using a heat diffuser, though these reduce the efficiency of induction heating.
Error Codes and What They Mean
Common induction cooktop error codes:
| Code | Meaning |
|---|---|
| E0 or E1 | No pan detected |
| E2 | Pan too small |
| E3 | Overheating warning |
| E4 | Sensor fault |
| F1 | Power supply issue |
Always check your specific model’s manualm, error codes vary between brands and cooktop models. For more information check out Common Induction Cooking Issues & How To Fix.
When to Reset Your Induction Cooktop
To reset most induction cookers: turn off the power, unplug for 30–60 seconds, then plug back in. This clears most soft errors and resets the induction controller. If issues persist after a reset, contact the manufacturer.
Common Mistakes That Ruin Temperature Control
Using the Wrong Cookware Size or Type
Using a small pan on a large cooking zone wastes energy and reduces consistent cooking. The magnetic field spreads beyond the pan and isn’t absorbed. Always choose cookware that matches the zone size and is induction-compatible.
Setting Heat Too High Too Fast
Jumping to a high power level instantly is one of the most common beginner mistakes. Induction heats so quickly that food can burn before you realize it. Start at medium and work up to your desired heat level.
Not Adjusting Heat During Cooking
Many home cooks set a power level and leave it. But cooking requires active heat management. As food cooks and liquid evaporates, the heat needed changes. Stay attentive and make small adjustments throughout.
Ignoring Preheating Techniques
Skipping the preheat leads to uneven cooking, sticking, and poor searing results. A properly preheated pan gives you better control once food hits the cooking surface.
Overusing Boost Mode
Boost mode is powerful, too powerful for most cooking tasks. Using it to cook eggs or simmer a sauce will result in burnt food. Reserve boost for boiling and rapid heating tasks only.
Cooking with Debris on the Cooktop Surface
Food residue or spills on the ceramic glass cooktop surface can interfere with heat transfer. Sometimes residue or spills also trigger false error codes. Keep the cooktop surface clean before and after cooking.
How to Cook More Efficiently on an Induction Cooktop
Why Induction Is More Energy Efficient
Induction cooking transfers about 85–90% of energy directly into the cookware. Gas stoves transfer only 35–40%. This energy-efficient induction technology means less wasted heat, lower energy bills, and a cooler kitchen.
According to the U.S. Department of Energy. Induction cooktops are more efficient than both gas and conventional electric stoves.
How to Reduce Energy Waste While Cooking
- Use cookware lids to trap heat and reduce cooking time
- Match pan size to cooking zone
- Don’t preheat longer than necessary
- Use residual heat to finish cooking after turning off the zone
These habits reduce your energy use without affecting cooking quality.
Matching Pan Size to Burner Size
This is one of the simplest ways to improve both efficiency and temperature control. A pan that’s too small or too large for the active cooking zone leads to inefficiency and uneven results. Check your cooktop’s manual for recommended pan sizes for each zone.
Cooking Faster Without Sacrificing Control
Start water on boost mode, then reduce once it’s boiling. Use boost mode for the first minute of preheating, then reduce to your desired cooking level. These small habits cut heat-up time significantly without losing control.
Does Induction Save Money on Electricity Bills?
Yes, but the savings depend on your usage. Because induction uses less energy to reach the same cooking temperature, you use fewer kilowatt-hours per meal. Over time, this adds up. Efficient appliances like induction cookers are popular as home appliances, that reduce both energy consumption and monthly costs.
How to Clean and Maintain Your Induction Cooktop
How to Clean After Every Use
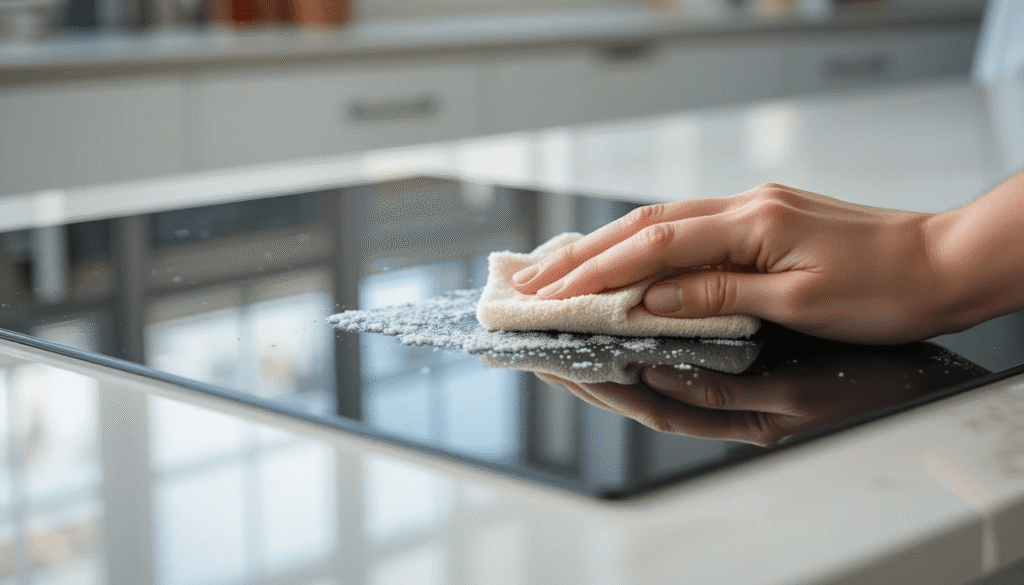
Wipe the ceramic glass cooktop with a damp cloth after every use. For light spills, a soft sponge and warm water is enough. Regular cleaning prevents buildup that can affect cooktop performance.
Never clean the surface while it’s still hot, wait for the residual heat to dissipate first.
Removing Burnt-On Food Safely
For stubborn burnt food, use a ceramic cooktop cleaner and a non-scratch scrubber. Apply the cleaner, let it sit for a few minutes, then gently rub in circular motions. Never use steel wool or abrasive pads, they’ll scratch the surface.
A plastic scraper designed for glass cooktops can help lift hardened food without causing damage.
Preventing Scratches and Surface Damage
Avoid sliding pans across the cooktop surface. Always lift cookware when repositioning. Drop cookware gently, heavy impacts can crack the glass. Don’t use the cooktop as a cutting board or prep surface.
What Cleaning Products to Avoid
Never use:
- Bleach or chlorine-based cleaners
- Steel wool or metal scrubbers
- Harsh abrasive powders
- Ammonia-based glass cleaners
Stick to cleaners specifically labeled for ceramic glass cooktop or induction surfaces.
How Maintenance Affects Performance
A clean cooktop performs better. Food debris on the surface can create uneven contact between the pan and the cooking zone. This causes a resulting temperature gradient and inconsistent heating. Regular maintenance keeps the surface flat, clean, and responsive.
Induction Cooking FAQs
Is Induction Cooking Safe?
Yes, induction is one of the safest cooking methods available. The cooktop surface doesn’t generate its own heat, so touching the surface (away from the hot pan) won’t burn you. There are built-in safety features. They include auto-shutoff, over-temp protection, and pan detection. These features make modern induction cookers very safe for home use.
Can You Use Aluminum or Nonstick Pans?
Plain aluminum is not induction compatible. However, many non-stick frying pans have a magnetic base layer and work fine on induction. Check with the magnet test. If the magnet sticks, you’re good to go.
Why Does My Pan Make Noise on Induction?
That clicking, humming, or buzzing sound is completely normal. It’s caused by the induction heating process, the magnetic field vibrating the metal in your pan. Some cookware types (especially layered stainless) make more noise than others. If the noise is very loud, try a different pan.
Can Induction Cook at a Precise Temperature?
Most standard induction cookers work in power levels, not exact temperatures. However, premium and smart induction cooker models do include precision temperature control features. For most cooking tasks, using a thermometer alongside your power level settings gives you all the control you need.
What Happens During a Power Outage?
Your induction cooker stops immediately during a power outage, just like all other electric kitchen appliances. There’s no flame to maintain and no residual heat from a heating element. This actually makes induction safer than gas stoves during emergencies.
Is Induction Better Than Gas for Temperature Control?
For most home cooks, yes. Induction gives you faster response, real temperature control, and instant heat reduction. All things gas stoves offer, plus better energy efficiency. Professional chefs who prefer gas often cite the visual feedback of a flame. But pure temperature management, induction is highly competitive. You can read more about induction vs gas cooking.
Conclusion
Ready to get more from your induction cooker? How power levels, cookware, and heat adjustments work together gives you complete control over every meal. Start with induction-compatible cookware, and learn your cooktop’s power levels through cooking. Lastly use a food thermometer to dial in exact temperatures when precision matters. Induction cooking rewards patience and attention, and once you have the hang of it, there’s no going back.